This is the ice-cream recipe that’s finally replaced every other method in this kitchen. It starts and finishes in the Vitamix — no stovetop tempering needed, no ice bath and only the blender and a few jugs to wash up. Make it for rich ice cream in a tub, and add stabilisers if you’re making paddle pops, and it uses whole containers of milk, cream and sweetened condensed milk. It has been scaled to make the right amount for 2 batches in my churn and each of those fit one tub that goes into the freezer.
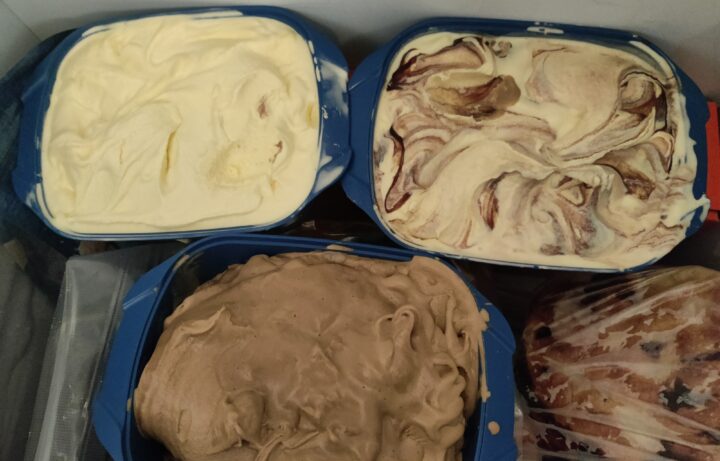
ICE CREAM (Easy Vitamix blender method)
Ingredients (see below for flavours)
- 395g tin sweetened condensed milk, consider the Coffee and Milk, Coconut or Top’nFill for flavour options
- 1000ml full cream milk (a carton of UHT whole milk is easy)
- 600ml thickened cream
- 60g white sugar
- 300g egg yolks, weighed (a seriously huge amount of egg yolk)
- 1 tbs vanilla extract or 2 tsp vanilla paste or a combination of both
- Pinch salt
- 1 shot alcohol of choice per churned batch, choose your flavour depending on the flavour of the ice-cream
- See below for flavour additions and optional add-ins
Tub Ice-Cream Method
- Separate the egg yolks. You need to have 300g. Add them to the blender.
- Add the 395g tin condensed milk (or alternate flavour), 60g sugar, 1 tbs vanilla essence and a pinch of salt into the blender. For a single-flavour vanilla batch, add the extra vanilla here too (see Flavour Variations below where extra vanilla is added in the churn).
- In a 2.5 litre jug, mix the 1000ml milk and 600ml cream together.
- Measure out 500–600ml of the combined mixture for the hot stage and heat it in the microwave, just to above blood temp. This helps to reduce the time for the blender to run. Put the rest of the milk/cream mixture into the fridge to keep it cold.
- Add the warmed milk/cream mixture to the blender
- Blend, starting at low speed and quickly increasing to maximum speed. Use an instant read thermometer in the top and blend until the mixture reaches 83°C — about 5 minutes if you started with warmed milk.
- Drop the blender speed back to 1–2 and pour the cold reserved milk/cream mixture straight in to the mix while it’s running slowly— the full batch fits in the jug at this stage. Blend briefly until combined; this cools and mixes it in one step, no separate stirring needed.
- Pour the finished custard back into the 2.5 litre jug and chill in the fridge overnight.
- CHURNING: If splitting the base across different flavours rather than making a single vanilla batch, add half the mix to the churn with the chosen flavouring now (see below), then churn, adding a shot of alcohol per batch to help with making the ice-cream scoopable.
- Churn until it’s ice-cream, transfer to a container. This is the time to add stir-ins like coffee granules, crushed biscuits, sauces or chocolate flakes. Freeze before serving.
- Repeat with the rest of the mix and add the different flavour.
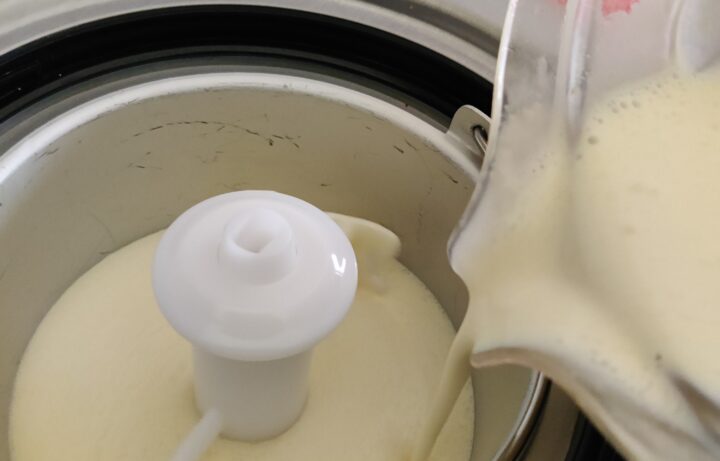
PADDLE POPS
This makes about 16 paddle pops. The ingredients and method are essentially the same as the ice-cream above but for additional thickeners to give a better “chew” and help hold the ice-cream to the stick.
Ingredients for paddle pops (see below for flavours)
- 300g egg yolks, weighed (a seriously huge amount of egg yolk)
- 60g white sugar (or brown depending on the flavour you’re going for)
- 395g tin sweetened condensed milk, consider the coffee and milk, Coconut, or Top’nFill to replace the sweetened condensed milk, but check below for suggestions for these flavour options
- 1 tbs vanilla extract
- Pinch salt
- 1000ml full cream milk (a carton of UHT whole milk is easy)
- 600ml thickened cream
- See below for flavour additions, optional add-ins and alternative flavours
Paddle Pop Additions
- 20g (2 tbsp) cornflour
- ½ tsp guar gum
- See below for chocolate coating (optional)
Paddle-Pop Method
- This follows the method above with stabilisers added at the beginning of the Vitamix stage.
- In a 2.5 litre jug, mix the 1000ml milk and 600ml cream together.
- Measure 200ml of the cream/milk mix into a 1 litre jug and whisk in the 20g cornflour and ½ tsp guar gum then add another 400ml of the combined mixture. Heat the mix in the microwave until warm. Put the rest of the milk/cream mixture in the fridge to keep it icy cold.
- Add the thickened milk mixture to the blender
- Separate the egg yolks. You need to have 300g. Add to the blender.
- Add the 395g tin condensed milk (or alternate flavour), 60g sugar, 1 tbs vanilla and a pinch of salt into the blender. For a single-flavour vanilla batch, add extra vanilla here too (see Flavour Variations below).
- Blend, starting low and quickly increasing to high. Use an instant read thermometer and blend until the mixture reaches 83°C — about 4-5 minutes.
- Drop the blender speed back to 1–2 and pour in the cold reserved milk/cream mixture while it’s running — the full batch fits in the jug at this stage. Blend briefly until combined; this cools and mixes it in one step, no separate stirring needed.
- Pour the finished custard back into the 2.5 litre jug and chill in the fridge overnight.
- In the morning put the sticks into the pop moulds and put them on trays that fit the freezer. Keep them cold until ready to fill.
- Churn in batches, adding desired flavours (see below) – No alcohol in this base. The base recipe uses a shot to keep scoop ice cream from setting too hard, but paddle pops need to stay firm, so it’s left out here.
- Fill the moulds, to just below the rim, tap the tray and adjust the sticks and freeze until solid, at least 6 hours.
- If chocolate coating waiting until they are completely frozen and do it in small batches to keep them from melting. See below
CHOCOLATE COATING FOR PADDLE POPS – OPTIONAL BUT GOOD
A thin, hard-set dipping ratio — leaner on chocolate and higher on coconut oil than a pourable topping, which keeps the shell thin and crisp rather than thick and prone to cracking off in slabs.
- 300g chocolate
- 120g coconut oil, measured solid
Method
- Have tray with a piece of baking paper if wrapping later, or a set of plastic wrap squares, on it and a space in the freezer ready to fit the tray.
- Weigh the 300g chocolate and 120g coconut oil into a microwave-safe bowl.
- Melt on medium power in 30-second bursts, stirring thoroughly after each, until smooth and glossy.
- Cool the mixture to 32–35°C before dipping — stir vigorously to bring it down faster if it overheats, and don’t dip above 40°C or the ice cream will melt and turn lumpy.
- Pour into a deep, narrow container such as a mug for dipping. For larger batches, sit the dipping container inside a pre-warmed, dry jug to hold the temperature steady while working through several pops.
- Dip each pop straight from the freezer, rotating to coat all sides, then hold it upright for a few seconds to let the excess drip off and the shell begin to set.
- Lay each pop directly on the plastic wrap squares to set and after about 8, wrap tightly and twist the ends closed. Move to the freezer. You can also lay them on baking paper or a silicone sheet and put into a small plastic bag and twist tie or tie it closed, squeezing out as much air as possible.
COATING VARIATIONS
Caramilk & Maldon Sea Salt
Use 300g Caramilk chocolate in place of the dark or milk chocolate, with the same 120g coconut oil. Lay plastic wrap squares on a tray and sprinkle Maldon salt flakes onto the centre of each. Dip the pop in the chocolate, let the excess drip off, then place it straight onto the salted wrap — the wet shell picks up the salt instantly on contact.
Pistachio, Kataifi & Tinted Chocolate
Combine 150g milk chocolate, 100g white chocolate and 50g Caramilk with the 120g coconut oil. Tint with oil-based or gel food colouring only — water-based colouring will seize the chocolate. Toast shredded kataifi pastry until golden and crush finely, then mix with coarsely chopped pistachios on a wide plate. Dip the pop in the chocolate, let the excess drip off, then immediately press or gently roll it through the kataifi-pistachio mixture on all sides before the shell sets.
Storage
- Freeze the wrapped pops immediately. Keeping the air out stops them getting icy.
FLAVOUR VARIATIONS
The flavour quantities below are starting points, not locked numbers and will vary depending on the size of the churn, just start small and add to taste, remembering that the flavour won’t be as strong when frozen.
Vanilla
2 tsp vanilla extract, 1 tbs Molina, added to the base rather than at churn — this suits a dedicated single-flavour batch and avoids forgetting it at churn time. If splitting one base across several flavours, hold the vanilla back for churn instead. 30g of malted milk powder is also an interesting addition.
If you want a strongly vanilla forward flavour add another 2 tsp paste in the churn.
Mocha
2 tbsp instant coffee and 3 tbsp cocoa dissolved in a small amount of the mix and add it to the churn. I have used coffee sachets. Nestle Coffee & Milk can be used as a substitute for the Sweetened Condensed Milk in the base and then extra coffee is not needed.
Affogato
This happens before the blending – Steep 1 cup whole coffee beans in the milk, warmed but not boiling, for at least an hour — overnight in the fridge gives a stronger flavour. Strain out the beans before blending with the rest of the base. Serve with a shot of your alcohol of choice poured over the top rather than churned in.
Affogato – with coffee and milk mix
Substitute the sweetened condensed milk with Nestle Coffee & Milk and add 2 tbs quality, freeze dried coffee in the base. Add more as a stir in when scooping ice-cream into the tub.
Peanut Butter & Chocolate
125g (½ cup) smooth peanut butter and 25g (¼ cup) cocoa, blended into the mix before churning — tastes like a Picnic bar.
Mint Choc Flake
Steep 1 cup (packed) fresh mint leaves in warmed milk the day before blending, then strain out and continue with the blending method. Stir through crumbled chocolate biscuits or a crumbled Flake bar at the end of churning.
Butterscotch
Replace the 395g tin condensed milk with a 395g tin Top ‘n’ Fill caramel, and for a salted caramel flavour add an extra tsp of salt, brown sugar instead of white and add 30g of malted milk powder — everything else stays the same. Top ‘n’ Fill on its own is mild once frozen, so the malt, brown sugar and salt are there to deepen it.
Pistachio & Kefir
Separate out the amount of base to be churned. Blend 125g (½ cup) pistachio paste and 200ml thickened kefir with the milk/cream mix before churning. The pistachio needs something tangy to hide the after taste of a high proportion of the paste.
Toffee & Biscuit Crumb
Crushed toffee lollies (think Werthers) and crumbled vanilla biscuits (Nice or Marie), stirred through in the last minute of churning as a mix-in, not a swirl.
Choc Flake
2 crumbled Flake bars, stirred through at the end of churning — flakes, not chips, for the texture. Don’t use chocolate chips, they don’t eat well, they are just hard lumps without flavour.
Malted Milk
50g malted milk powder added to the mixer alongside the other ingredients.
Miso & Caramel
Replace the 395g tin condensed milk with a 395g tin Top ‘n’ Fill caramel, as in the Butterscotch variation, and add 30g (2 tbsp) white miso paste.
Peanut Butter, Miso & Milk Chocolate
125g (½ cup) smooth peanut butter and 20g (1 tbsp) white miso, blended into the base with the other ingredients. Pair with a plain milk chocolate Chocolate Coating rather than a cocoa mix-in, for a sweet-and-salty finish.
SWIRL-INS
Unlike the Flavour Variations above, these are folded through after churning — at the soft-serve stage, as the ice cream goes into its container — so they run through as ribbons and pockets rather than mixing evenly into the base. Don’t add these to ice cream that’s already frozen hard; fold them through while it’s still soft enough to move.
Chocolate Ripple
110g (½ cup) sugar, 80ml (⅓ cup) golden syrup, 125ml (½ cup) water and 6 tbsp Dutch-processed cocoa, heated together stirring until it boils, then simmered for 1 minute, still stirring. Remove from heat and stir in ½ tsp vanilla extract. Chill completely before folding through the soft-churned base.
Toasted Marshmallow
Spread 4 cups mini marshmallows (or larger ones, cut up) on a foil or silicone-lined tray and brown all over with a kitchen blowtorch. Fold through the soft-churned base along with crumbled Arnott’s Gingernut biscuits, if using, for a toasted-marshmallow-and-biscuit swirl.
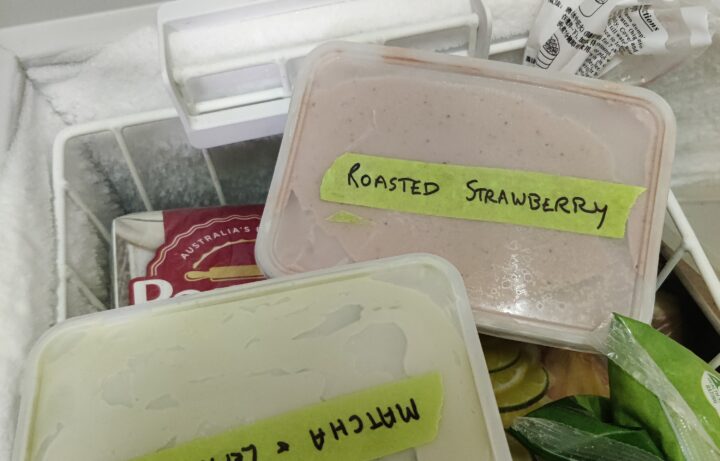
Roasted Strawberry
Hull and quarter 500g strawberries, toss with 50g (¼ cup) brown sugar, and roast at 200°C for 20–25 minutes until dark and syrupy. Cool completely, then lightly mash, leaving some texture rather than pureeing smooth. Fold through the soft-churned base — pairs well with the Vanilla variation as the base flavour.
NOTES
A 2.5 litre jug is needed to hold the full 1600ml milk and cream mixture before it’s split into hot and cold portions, and again afterwards to hold the finished custard.
The full batch fits back in the Vitamix container after the hot stage, so cooling is done by pouring the cold reserved portion straight in and blending briefly at speed 1–2, rather than stirring the two together by hand in separate jugs.
The 300g egg yolks, the 83°C target and mixing the milk and cream together before splitting it into hot and cold portions all do the work — cornflour only used in the Paddle Pop Additions.
If a batch ever doesn’t thicken properly at 83°C, pour it into a saucepan and stir over low heat for a minute or two until it coats the back of a spoon — that’s a fallback for an off batch, not a required step. This does not reach a custard thickness, but doesn’t need to.
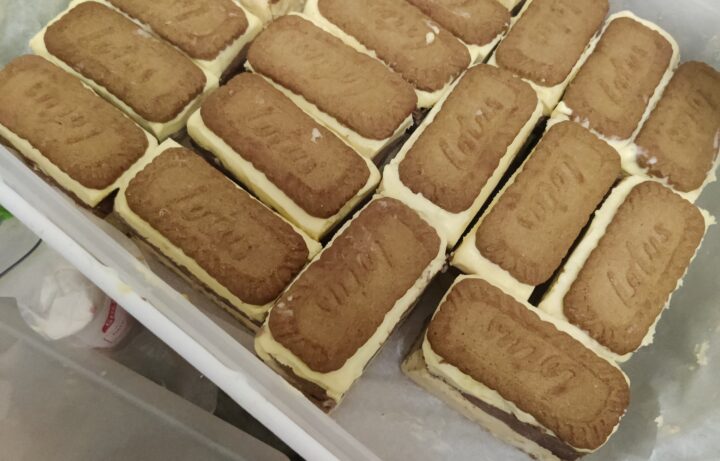
Biscoff biscuits make amazing ice-cream sandwiches.