 This is a simple focaccia recipe that uses sourdough, so it makes it a bit healthy. I am in this for the outcome, not the process, so something with minimal effort but a pretty good outcome is my aim. We don’t eat any white bread, or in fact barely any bread at all so this is just for those family or friends for dinner nights where I need something pretty spectacular, yet easy, to put on the table. It doesn’t take long to get the dough into the pan and cooking.
NO KNEAD NO FUSS FOCACCIA
This is the focaccia you make when you want fresh bread on the table today — not tomorrow, not after a two-day starter build, today! Mix it in the morning, prove it in the afternoon, and pull a golden, pillowy loaf out of the oven in time for dinner. It is honestly one of the most forgiving and rewarding things you can bake, and once you have made it a few times it becomes the kind of recipe you do on autopilot. We served this straight from the oven alongside a baked brie and it was gone before anyone had a chance to think about it.
Ingredients
- 300g white baker’s flour
- 200g organic stoneground white baker’s flour
- 7g instant yeast
- 10g fine salt
- 350ml warm water
- 30ml extra virgin olive oil (for the dough)
- Light olive oil for the tray
- Extra virgin olive oil for finishing
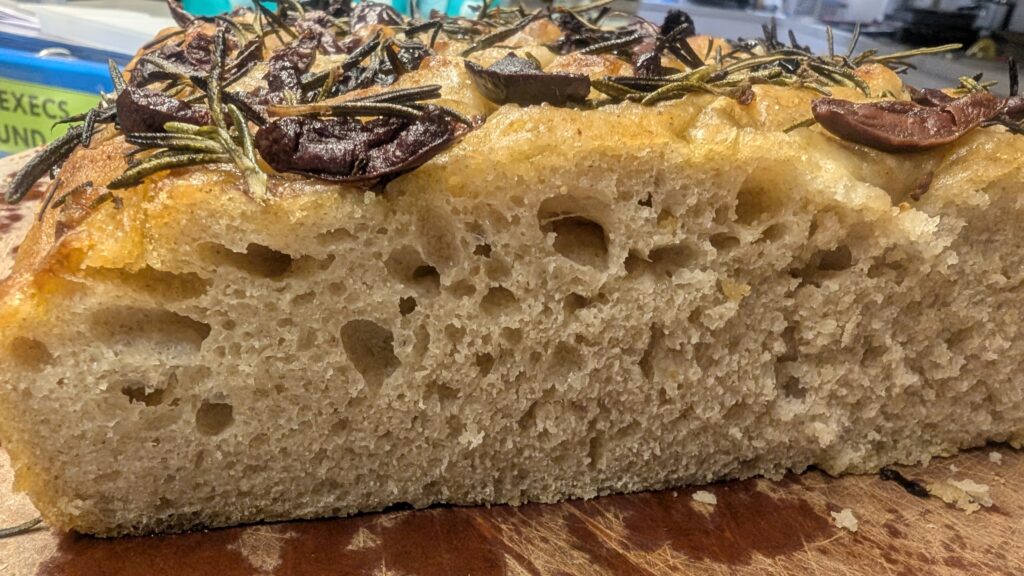
- Fresh rosemary sprigs
- Flaky sea salt
Active Starter
- 100g active sourdough starter, or any starter that’s not dead. If you have any leftover from baking then this is where to use it.
- 50ml warm water (to loosen the starter)
Method
- If using active starter, loosen it in the 50ml warm water and stir well until it is fully dispersed. Set aside.
- Add the flours, yeast and salt to the bowl of a stand mixer fitted with the dough hook. Combine briefly on low speed.
- Add the warm water, olive oil, and loosened starter if using. Mix on low speed for 2–3 minutes until the dough comes together into a sticky, shaggy mass with no dry flour remaining. It will be very wet — this is correct. Do not be tempted to add more flour.
- Cover the bowl with plastic wrap or a clean tea towel. Place in the V-ZUG on the Professional Baking Proofing setting at 32°C for 2 hours, or until doubled in size. Any other warm place will just take longer.
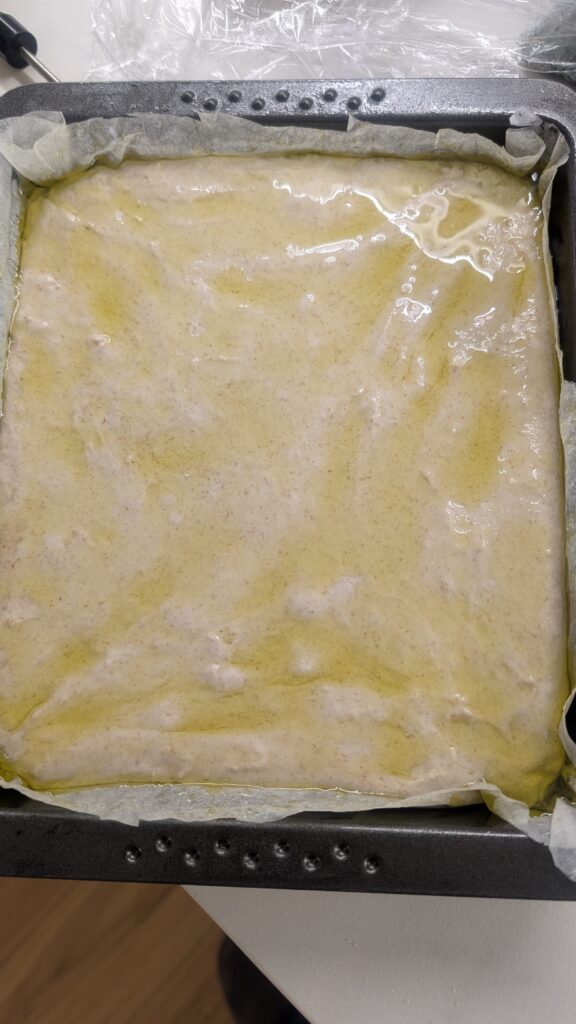
- Very generously coat a 23 x 33cm baking tray with light olive oil, making sure the sides are covered too. It is fine for it to puddle a bit on the bottom.
- Tip the dough into the oiled tray. Oil your hands and gently press the dough out towards the edges. If it springs back, leave it to rest for 10 minutes and try again — do not force it.
- Cover loosely and return to the V-ZUG proofing setting at 32°C for a further 2 hours until the dough is puffy, jiggly and bubbly.
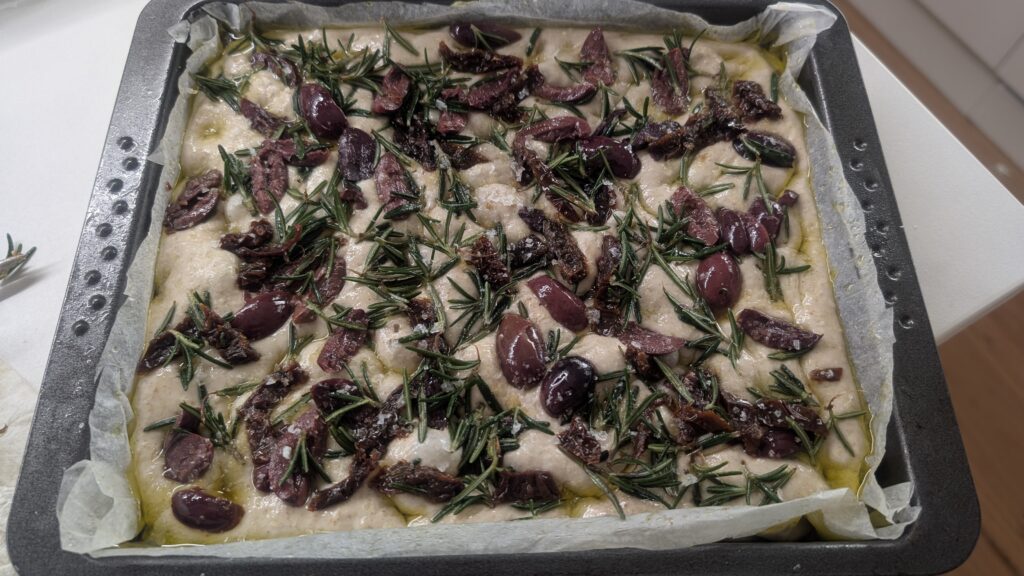
- Do the poke test (see notes). When the dough is ready, drizzle very generously with extra virgin olive oil. Press your wet fingers firmly into the dough to create deep dimples all the way to the bottom of the tray. The oil will pool in these dimples.
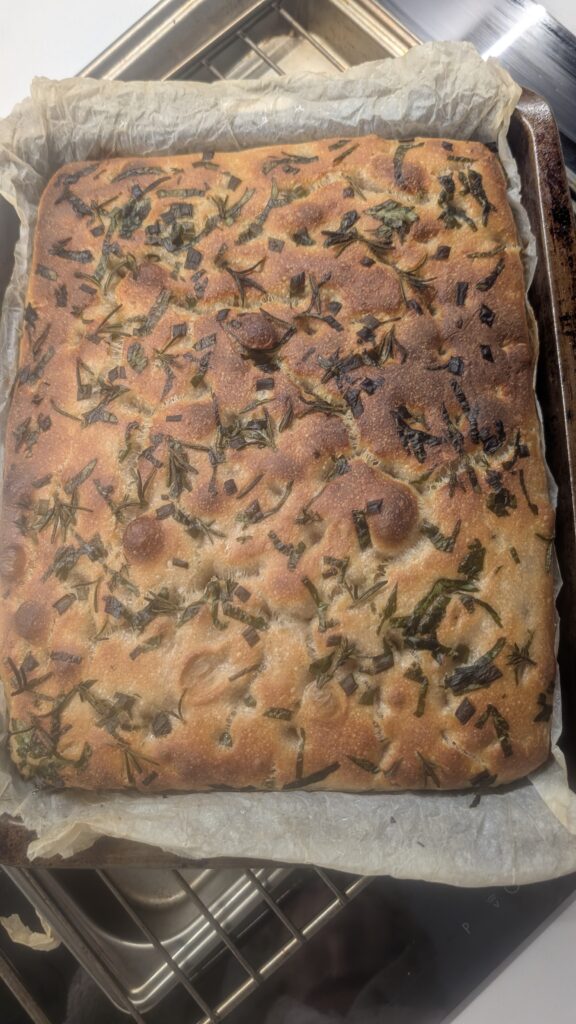
- Scatter rosemary sprigs and flaky salt over the top. Drizzle with a little more olive oil to protect the rosemary from scorching.
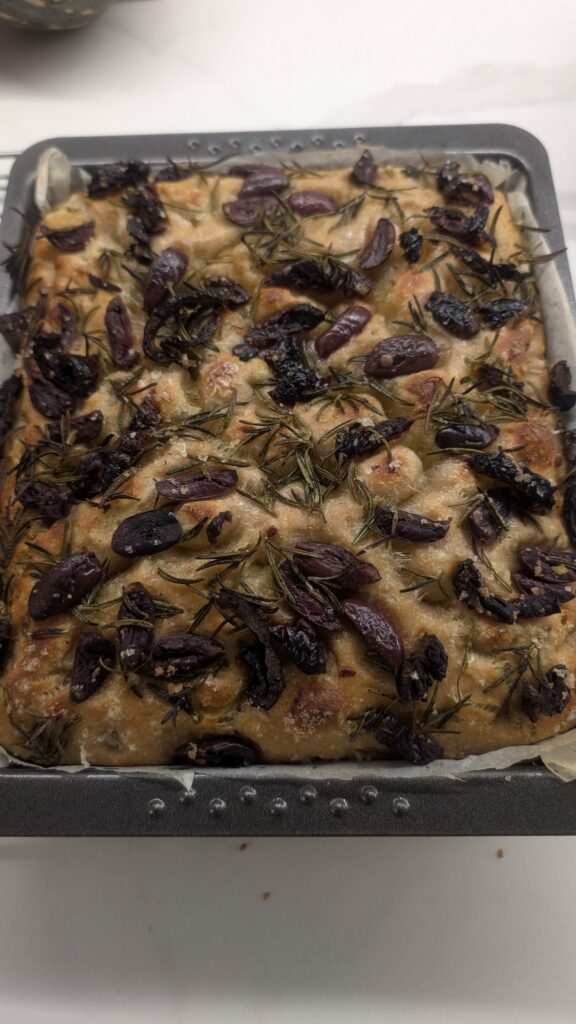
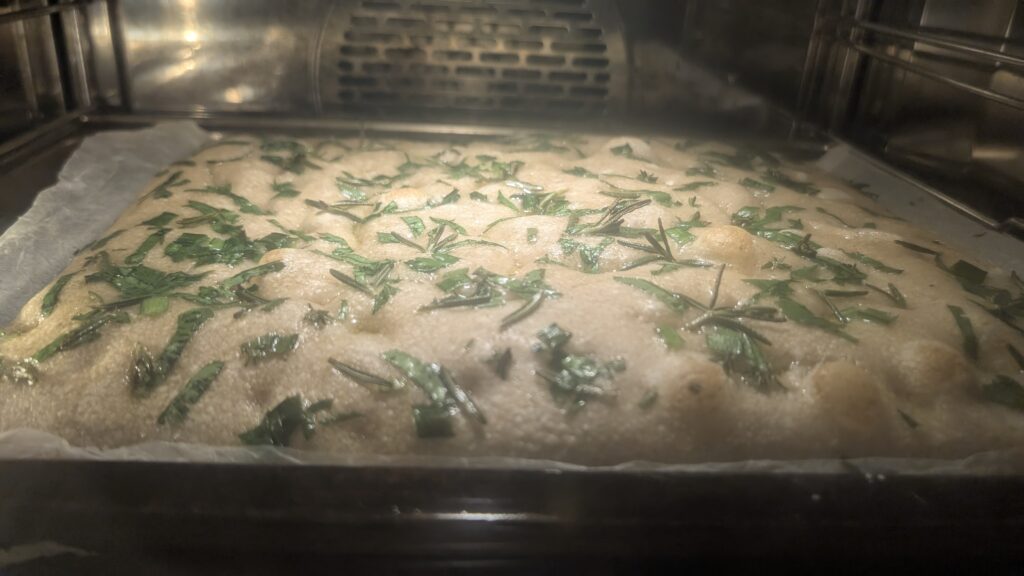
- Bake on the V-ZUG Professional Baking – Flour Dusted setting. The oven will manage temperature and steam automatically. Bake for 20–25 minutes until deep golden on top and crisp on the bottom.
- Remove from the oven and transfer to a wire rack. Serve hot or at room temperature. Slice and toast leftovers.
Notes
No starter? Simply omit the starter and increase the main mix water to 400ml. The yeast alone gives an excellent result — slightly lighter in colour and a little more neutral in flavour, which many people prefer.
Want a more rustic, nuttier flavour? Reverse the flour ratio — use 300g stoneground and 200g baker’s flour. The crumb will be slightly denser and the colour a little more golden. Both versions work well; the standard recipe above gives a lighter, more open crumb.
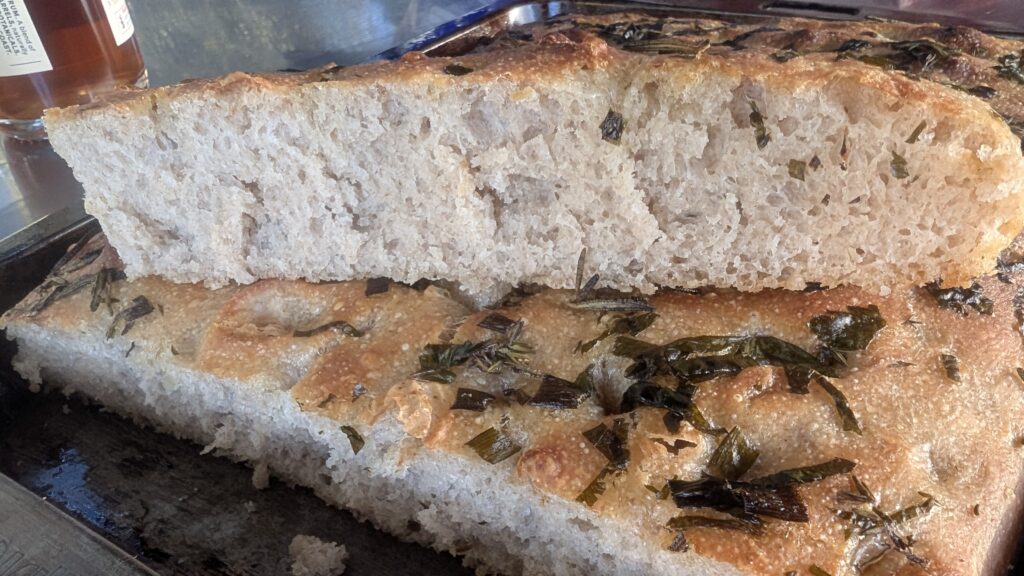
Tray size: A 23 x 33cm tray gives a focaccia about 3–4cm thick when fully proved — ideal for deep dimples and a pillowy crumb. A larger tray gives a thinner, crispier result. Both work; it is a matter of preference.
Oven Setting: * High Initial Heat for Oven Spring: Focaccia thrives on high heat. Putting it into a preheated oven ensures a rapid expansion (oven spring), creating that characteristic airy, open crumb and bubbly texture.
* Proper Crust Development: The immediate high heat helps to rapidly set the crust, contributing to the desired crispness on the outside while keeping the interior soft. The steam injected by the oven (which the “Flour Dusted” setting uses at the beginning) will further enhance crust development, making it thin and crispy
* Set the temperature to 220-240°C
* Allow the oven to fully preheat.
The poke test: Before dimpling, lightly flour one finger and press it about 1–2cm into the dough. If the indentation springs back slowly and partially, leaving a shallow dent that does not fully disappear, the dough is perfectly proofed and ready to bake. If it springs back immediately, give it more time. If the dough deflates and does not spring back at all, it is overproofed — get it in the oven immediately.
Timing flexibility: This dough is forgiving. If guests arrive early and you need to pull it from the second prove before the full 2 hours are up, go ahead — drizzle, dimple and bake. It will still be excellent.
Topping variation: Caramelised onions spread over the dough after dimpling are excellent. Add them before the final oil drizzle so they are coated and do not catch.
Ordinary oven: Preheat to 240°C. Place an empty baking dish on the bottom shelf and add a cup of boiling water when the focaccia goes in to create steam. Bake for 25 minutes.
Freezing: Slice, freeze in portions. Toast from frozen directly — no need to thaw.
Tags: focaccia, bread, no knead, same day, yeast bread, Italian bread, olive oil, rosemary, sourdough optional, entertaining, freezer friendly, V-ZUG, combi oven, stoneground flour